By the end of this lesson you should understand:

Objects in LiveCode are
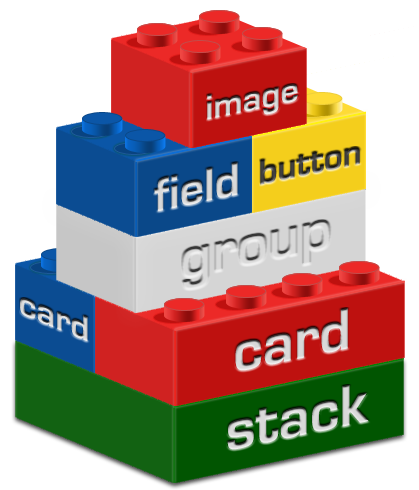
Like Software Building Blocks
In the previous lesson we compared LiveCode to a Lego set, in the sense that you can build many different things with it by using a supply of standard yet versatile pieces. With a Lego set you have a supply of bricks of different sizes, shapes and colors. In LiveCode the basic “building blocks” that we’ll use to build applications are called objects. In LiveCode there are several different types of objects as well as variations within object types. In this lesson we’ll take a look at each type of LiveCode object.
The fundamental building block in LiveCode is the stack. No other object can exist independent of a stack. So the first step to creating an application is to create a stack. This is accomplished by selecting New Mainstack from the File menu. Once the stack is created you can add other objects.
You may be interested to know that the entire LiveCode IDE is itself built in LiveCode. In fact, every window you see in the authoring environment (including all those fancy palettes) is a stack. This gives you an idea of the flexibility of the LiveCode environment.
The next fundamental building block in LiveCode is the card. Every stack displays the information it contains on one or more cards. By design every stack has to have at least one card (preserving the metaphor of the stack of index cards). That means that every time a new stack is created, a card is created as well, so you never have to manually create the first card.
As mentioned earlier, cards are where a stack displays the information it contains. The user can place different types of information and objects on different cards, so that the appearance of the cards would begin to differ one from another. A stack can theoretically have an unlimited number of cards, but practically speaking when a stack reaches several thousand cards LiveCard’s performance can become sluggish and unwieldy. Even though a stack may have several cards, only one card in the stack, along with the objects present on that card, is visible at a time.
To add a card to the stack, just select New Card from the Object menu (or use the keyboard shortcut indicated in the menu: ⌘ + N on Mac, Ctrl + N on Windows and Linux).
Group objects can contain other control objects,
but can also be placed on more than one card.
Groups are a special type of object in LiveCode. They are somewhat like cards in that they can contain other types of control objects, creating what are called “grouped controls.” But groups, along with the controls grouped within them, can also be placed on cards. In this way groups behave much like control objects. The dual nature of groups has important implications that we will discuss in a later lesson.
All other objects (known as “controls”) are contained by and displayed on cards in one fashion or another. The main control objects we will use in this course are buttons, fields, images, graphics, and players. There are other types of control objects, like scrollbars and menus, that we will not spend much time on in this course.
Let’s take a closer look at the various control object types that LiveCode provides us.
One control types you will use a lot in LiveCode is a button. A button control takes a mouse click from a user, then performs a specific action or series of actions. So buttons typically are controls that allow the user to interact with the content in a stack.
You create a new button on a card by clicking and dragging one of the button tools in the Tools palette onto the card.
You may also create a button by choosing New Control from the Object menu. Just choose the type of button you want, and a new button will be created and placed automatically in the center of the card.
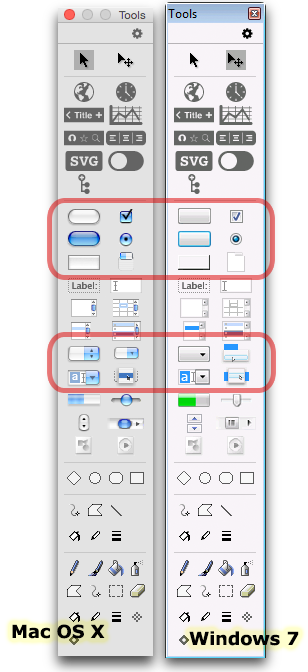
Note that the appearance of the buttons and other objects on the Tools palette corresponds to the “look and feel” of whatever operating system you are working on. Objects in a LiveCode stack opened on Windows will assume the Windows look and feel. If you were to open the same stack in Mac OS X the objects would assume the OS X look and feel. And stacks opened on a Linux System would look and behave like the version of Linux you were using. This feature makes it easy to create cross-platform applications in LiveCode without having to worry about specific interface issues for each platform.
As you may have noticed by now, there are several types of buttons available for use in applications. Their appearance and behavior differ according to their function and purpose. The tool palette provides access to all buttons, including all the shapes of standard buttons, tabbed buttons, checkbox buttons, radio buttons, and menu buttons. While all of these buttons are quite useful, we will focus on some types more than others in this course.
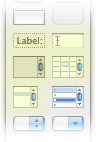
Field tools on the
LiveCode Tools palette
A field in LiveCode is a container for holding and displaying text. Fields can be used to present text for the user to read, to display labels for other objects on the card, or to provide a place where the user can type, e.g., to fill in information, answer a quiz question, etc.
As with buttons, you can create a field on a card by clicking and dragging one of the field tools in the tools palette (as indicated at right) onto the card.
You may also create a field by choosing a field type under New Control under the Object menu. This creates and places a new field in the center of the card. As with buttons, there are several different types of fields. We will cover the most common ones during the course.
In an unlocked text field the user has all the basic text editing capabilities. When you move the cursor into an unlocked text field, it changes to the familiar I-beam shape; clicking then gives you a blinking insertion point marker typical of most text editors and word processors.
In LiveCode fields you can:
Still, LiveCode fields do not have the capabilities of a full-featured word processor. For instance, text fields don't have advanced features like spell checking, footnotes, robust table support, etc.
Another type of control object in LiveCode is a graphic. A graphic object is a resizable vector shape that appears on a card. Since it is a shape defined by a mathematical formula (rather than ‘bitmapped’ data, as with images), it may be altered and transformed without becoming distorted or pixilated, as can happen with images.
Graphics can be created by selecting the desired tool from the tools palette. You may also create a graphic by choosing a graphic type under New Control in the Object menu. This creates and places a new graphic in the center of the card. As with other control objects, there are several different types of graphics.
Another type of LiveCode control object that can appear on cards is an image. Image objects can display bitmapped data, most often photographs or high-quality images produced in applications like Photoshop. LiveCode can display several of the most common image formats, including JPEG, PNG, GIF and BMP. We will discuss how to add images to a stack in a later lesson.
The simple paint tools at the bottom of the Tools palette can be used to modify existing images or to create simple, new images. The paint tools are fairly rudimentary, however, so any modifications to complex images are best done in a dedicated image editing program like Photshop.
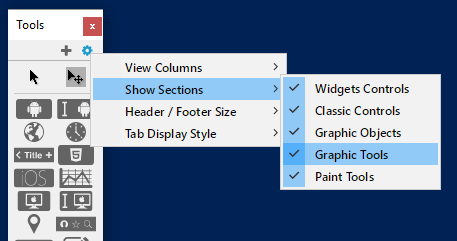
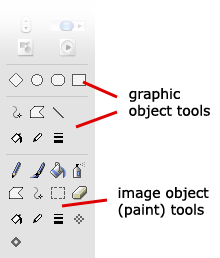
Hiding and Showing Graphics and Paint Tools
By default, the graphics and tools are not shown, but you can click the gear icon on the top right of the tools palette (see right) in order to reveal the graphics object and paint tools.
Players are control objects in LiveCode are that allow us to play back Quicktime-compatible audio and video files on the card. The player’s built-in controller can give the user control over playback of the media. We will discuss players in more detail in a later lesson.
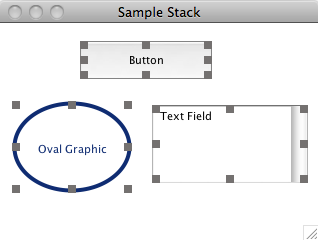
Object handles
In experimenting with control objects, you may have noticed that each time a new control is created, it comes surrounded by eight little dark gray boxes. These are called “gadgets” or “handles.” When an object’s handles are visible, this means that the object has been “selected” with the pointer tool and can be edited. You can click and drag any of these handles to resize the object as desired.
When an object is selected you can also reposition it by clicking within the object, and dragging the it to a new location on the card. You can “nudge” a selected object by using the arrow keys on your keyboard.
You can delete a selected object by pressing the Backspace or Delete keys, or by choosing Edit menu > Clear.
Objects can also be duplicated in several ways:
Object/Property Exercise, Part 1