Photoshop is the premier bitmap image editing application; it is not intended for creating and editing vector graphics (i.e., painting, not drawing; in LiveCode terms, it lets you edit images, not graphics.) There are other applications that do many of the same things as Photoshop at a far lower cost, including GIMP, a free, open-source project, and Sumo Paint, a flash-based image editor that runs in your browser (see http://www.sumopaint.com). Many of the editing principles you use in Photoshop will transfer over to other applications.
Terminology
- Antialias
- Jaggie killer, line smoother. Smooths straight edges of a bitmap by adding shades of similar gray or color to the edges of the line.
- Gradient
- A smooth blending of shades from light to dark or from one color to another.
- Aspect ratio
- The ratio of the width to the height of an image, video, etc. 4:3 was the traditional aspect ratio for standard-definition TV and computer monitors, but the newer, high-definition TV standard is 16:9, or 1.78:1. Most new computer monitors have also adapted this aspect ratio.
- Alpha Channel
- The portion of each pixel's data reserved for transparency. Enables varying levels of transparency in an image. Allows for semi-transparent shadows, highlights and other effects.
- Bitmap image
- A type of graphic composed of pixels, or picture elements in a grid. Each pixel has its own color and alpha channel information. Bitmap images have a fixed resolution and can become distorted when resized. Bitmap images are sometimes referred to as raster graphics.
- Vector graphic
- Resolution-independent, scalable graphic composed of individual objects that are defined by mathematical calculations. Vector graphics can be resized without loss of quality.
- Lossy compression
- Compression algorithm applied to a bitmap image file, which, in addition to reducing the file size, also causes a reduction in the quality of the image. JPEG is a lossy compression.
- Lossless compression
- Compression algorithm applied to a bitmap image file reduces the size size of a file while preserving the full quality of the image. GIF and PNG formats use lossless compression.
- Gamma correction
- From http://www.libpng.org/pub/png/pngintro.html:
"Gamma correction basically refers to the ability to correct for differences in how computers (and especially computer monitors) interpret color values. Web authors in particular are probably aware that Macintosh-generated images tend to look too dark on PCs, and PC-generated images tend to look too light on Macs. An image that looks good on an SGI workstation won't look right on either a Macintosh or a PC, and even a PC-created image won't look right on all PCs.
"Gamma information is a partial solution. It's a means of associating a single number with a computer display system, in an attempt to characterize the tricky physics lurking within a graphics card's digital-to-analog converter (RAMDAC) and within a monitor's high-voltage electron gun. Gamma is only an approximation; a better approximation is to use so-called chromaticity values (also supported by PNG) as well as gamma, but even this is an approximation. The absolute best solution currently available is to use a complete color management system (which, again, PNG supports via the sRGB extension chunk). For most people, however, just supplying the gamma value of the image and correcting for the corresponding gamma value of the monitor system is sufficient."
LiveCode allows you to set a gamma correction on your images via thescreenGammaproperty. It must be set before an image is displayed for it to have any effect on the image. A very common gamma setting for computer monitors is 2.2.
Important tools
Basic image manipulation
- Move - allows you to move a layer or selections to a new location on the canvas.
- Hand - Used to navigate through a large image, by "drag scrolling". Holding down the mouse and dragging brings other parts of the image into the viewable area of the window.
- Crop - Lets you delete parts of the image you don't want. Draw a box around the area you want to keep, adjust the box, then press return or enter to crop.
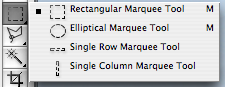
Selection tools
- marquee tool - selects rectangular or oval areas
- lasso tool - selects "freehand" areas that you draw with the cursor
- magic wand tool - selects pixels based on similar color
Selection modes (on toolbar at top when one of the selection tools is active)Painting Tools

- new selection
- add to selection (shift key to quick-select this mode)
- subtract from selection (alt/option key to quick-select this mode)
- intersect with selection (shift + alt/option key to quick-select this mode)
- Paint/Pencil tool (click and hold on tool to switch between)
- Paint Brush - paint foreground color using various brush shapes and sizes
- Pencil - 1 pixel wide freehand lines in foreground color
- Color Picker/eyedropper - copy the color you are hovering over
- Fill/Gradient tool (click and hold on tool to switch between)
- Fill ("paint bucket") - fill an area with a solid color
- Gradient fill - fill an area with a color gradient
- Text - create an editable text layer; edit existing text layers
Good sources for free fonts
http://www.dafont.com http://www.webpagepublicity.com/free-fonts.html http://www.cthulhulives.org/toybox/PROPDOCS/PropFonts.html http://www.fontsquirrel.com/- Shape - create various filled shapes—rectangles, ellipses, polygons, lines, etc. (More on this below.)
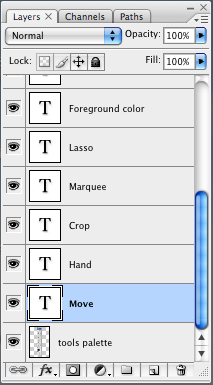
The way that Photoshop allows you to keep different bitmapped elements separate from one another, thus making it possible to edit elements separately. Control layers from the Layers palette.
Each layer can have various "Effects" applied that don't affect the other layers.
Layers and effects can be hidden and shown to create various "states" of the image.
Layer effects available in Photoshop include all of the graphic effects familiar to LiveCode users, plus several others. In addition, the level of control over effects is far superior in Photoshop, as one would expect from a professional grade, dedicated image editing application.
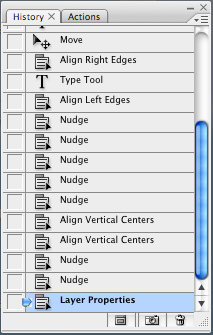
Undo the last action with Command (Control) - Z.
History palette keeps track of a limited number of changes (you can specify this number in Preferences.) Allows you to take out or restore any series of changes to compare to a previous state.
History Snapshots: Use the snapshot (camera) icon at the bottom of the history palette to save states of your document in case you want to revert after many changes.
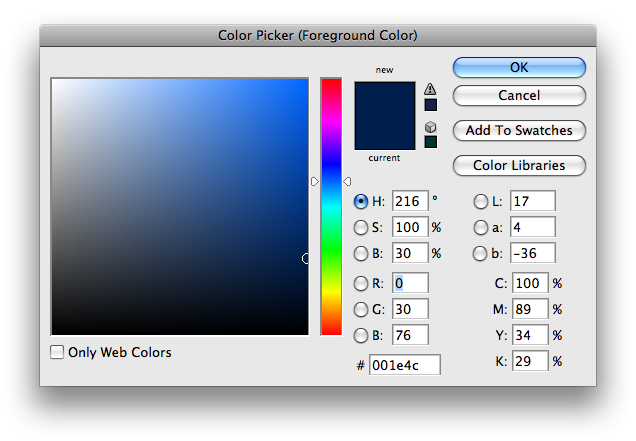
RGB vs. HSB vs. CYMK
- RGB:
- setting the Red, Green and Blue color channels to create the exact color you want. This is the most common method used for choosing computer screen (as opposed to print) colors.
- HSB:
- setting the Hue, Saturation and Brightness to create the exact color you want. It's an alternative method to RGB.
- CYMK:
- setting the Cyan, Yellow, Magenta, and Black (K) color channels to create the exact color you want. Used most commonly in the print world.
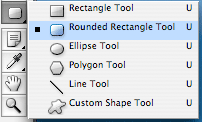
Shape tools - 3 modes
Drawing an unfilled shape - 2 methods:
- Method 1. Using selection and stroke tools.
For rounded rect, after marquee tool, choose Select menu > Modify > Smooth. Choose radius, click OK. Then follow steps 2 - 4.
- Use one of the marquee tools (rectangular or elliptical) to draw the desired shape.
- Choose Edit menu > Stroke...
- Set options: width, color, location blending. Click OK
- Unselect (Cmd-D)
Drawback of this method: curved edges not smooth (not antialiased).Method 2. Using the shape tool. A bit more complex, but produces antialiased edges.
- Create a new layer (Layer menu > New > Layer).
- Choose the rounded rectangle option of the shape tool.
- Choose Fill Pixels mode on the toolbar.
- On the toolbar, set opacity to 100% and check the antialias box.
- Drag the mouse pointer to create the desired shape and size of rectangle.
- In the layers palette, directly below the opacity slider, is the "Fill" slider. Set it to 0%.
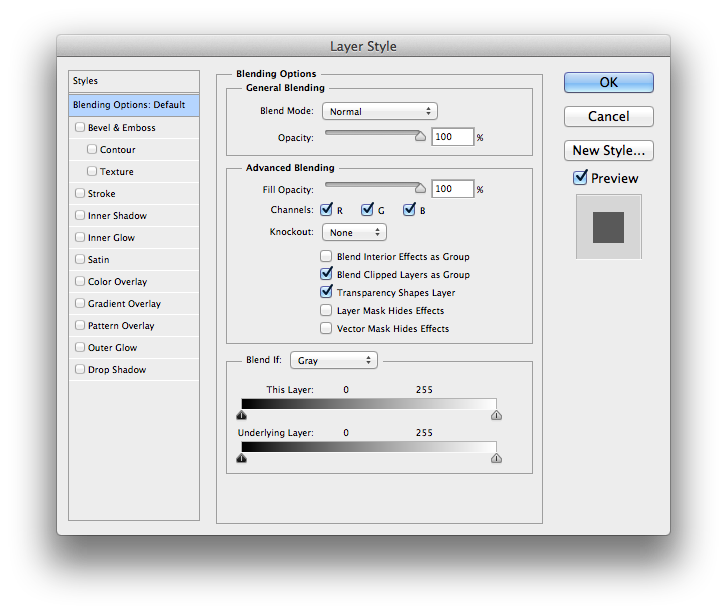
- Bring up the "Layer Style" dialog (usually by double clicking in an empty area on the layer.)
- Select the "Stroke" option from the left menu, make sure it's checked. Adjust your stroke settings as desired.