Of course, the ultimate goal of any software developer is to get their program into the hands of users. If everyone needed their own a copy of LiveCode in order to run the stack, distribution would be difficult. Fortunately, LiveCode provides a robust set of tools for creating double-clickable, stand-alone applications on any supported platform. These standalone applications may be distributed without the developer having to pay royalties to LiveCode Ltd. (Keep in mind that if you distribute applications built with LiveCode Community you must make your source code public, in accordance with the GNU General Public License, or GPL, under which the Community version is distributed. To distribute closed-source commercial applications you would have to purchase a commercial license of LiveCode (Indy or Business Edition).)
Let's look at some tools and settings that LiveCode gives us for creating well-behaved cross-platform standalone applications.
Sometimes you will notice that a stack or standalone changes appearance in minor ways when moving it between platforms. For instance, the fonts might be slightly different, or the background color might be different. This is due in part to differing default settings that the LiveCode engine uses on different platforms. One way to avoid these differences is to set the stack's textFont, textStyle, and textSize properties, and its backgroundColor, foregroundColor, and other color properties, to the values you want before creating the standalone.
Even though LiveCode presents several common button styles—Push Button, Default Button, Checkbox, etc., the appearance and behavior can be different enough between platforms that you will want to be sure to test them extensively on all platforms you are targeting.
As you know, menus look and behave differently on Mac OS vs. Windows and Linux systems. Most obviously, menus on the Mac OS appear at the top of the screen, while on Windows and Linux they appear in the application window. That means that you have to leave a little extra room at the top of your card for a menubar, if you are planning to deploy on Windows. This menubar would be hidden on Mac systems, so you have to decide if you like having the blank strip at the top of the card, or if you would rather resize the stack window slightly when running on Macs. LiveCode does provide some automated help in this regard, but you still need to check it on all platforms to make sure it works the way you want.
The various operating systems take differing approaches to securing certain areas of the file system against changes that could adversely affect the performance of the system. For instance, you don't want to allow programs (or LiveCode stacks!) to delete critical system files. To prevent this, operating systems impose a system of permissions that determine which users or programs can write to which directories on the disk. Operating systems also provide certain directories that are always available and "safe" to write in. Examples include the user's Documents folder, the user Preferences folder and others. LiveCode provides the specialFolderPath function to provide a cross-platform way of referring to these folder locations.
Another way to compensate for platform appearance differences is to use profiles. A profile is a set of object property settings that can be used to quickly change things like languages, appearance and so forth in your stack. Creating profiles can be a useful strategy of optimizing your stack for different operating systems. For example, you might create separate profiles for Macintosh and Windows that use different fonts for buttons or fields, or that set slightly different background colors to compensate for the slightly different screen gammas (darkness or lightness of colors) between Mac and Windows monitors.
Keyword |
Type |
Description |
platform |
function |
The
|
environment |
function |
The |
machine |
function |
The machine function returns
the type of hardware the application is running on. For instance, if you
were running on a Macintosh iMac, this function would return Apple's official code for the model, something like "iMac18,3". For other systems the function returns one of the following:
|
processor |
function |
Use the The
|
systemVersion |
function |
The This allows you to check for specific versions of the Mac and Windows
OS. For example, on the latest revision of Mac OS X "Catalina" (as of December 2020) it returns "10.15.7". On Windows 10 |
specialFolderPath |
function |
The |
lookAndFeel |
property |
The The |
Once the stack is done and you have accounted for differences between platforms, the next step is to establish the desired settings. To do this choose Standalone Application Settings... from the File menu. This brings up a special settings window that make it simple for you to prepare a stack or stacks for distribution as a standalone application.
|
|
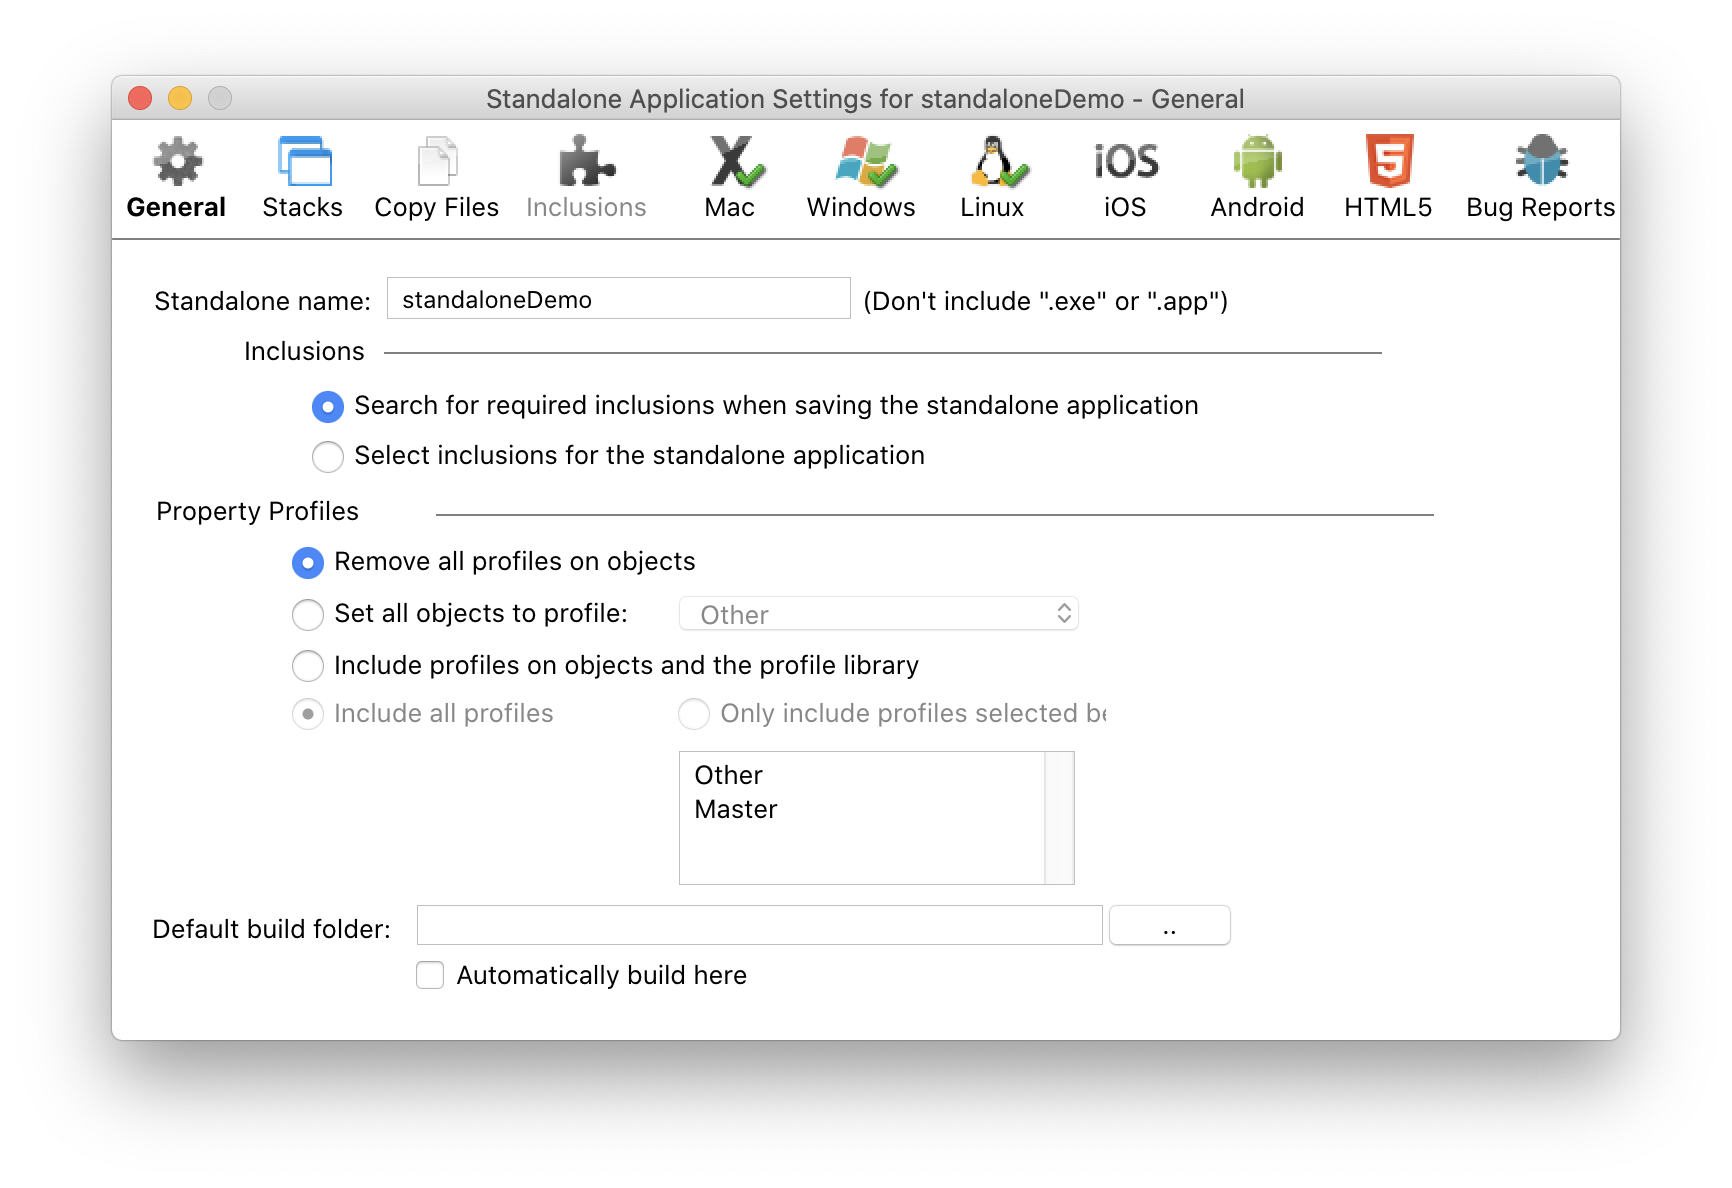
General settings.Standalone Name: The name of the standalone application you want to create. Inclusions. Here you can choose to include various types of resource in the standalone file. The first radio button ("Search for required inclusions...") will scan your stack and attempt to automatically include the required libraries in the standalone. Alternatively, you can check the"Select inclusions..." button to manually choose the libraries to include in the standalone. You can do this in the Inclusions tab. (See below.) What you check depends upon what resources your stack uses. For instance, if you have no animations in your stack you don't need to keep the Animation Libraries in the distribution. If you use the ask and answer commands in your stack be sure to check the Ask Dialog and Answer Dialog check boxes. Property Profiles. A profile is a set of property settings for an object. You can create multiple profiles for each object in your stack in the Profile panel of the Property Inspector. In this section you can choose which profile will be used when building your standalone application. For example, you might create separate profiles for Macintosh and Windows that use different fonts for button or field objects. Here you can choose to either remove all profiles from all objects in your stack (in effect making the settings in Master profile the ones that are used), choosing a specific profile for all objects to use, or to include all profiles and the profile library, making it possible for users of your standalone to choose a profile. |
|
|
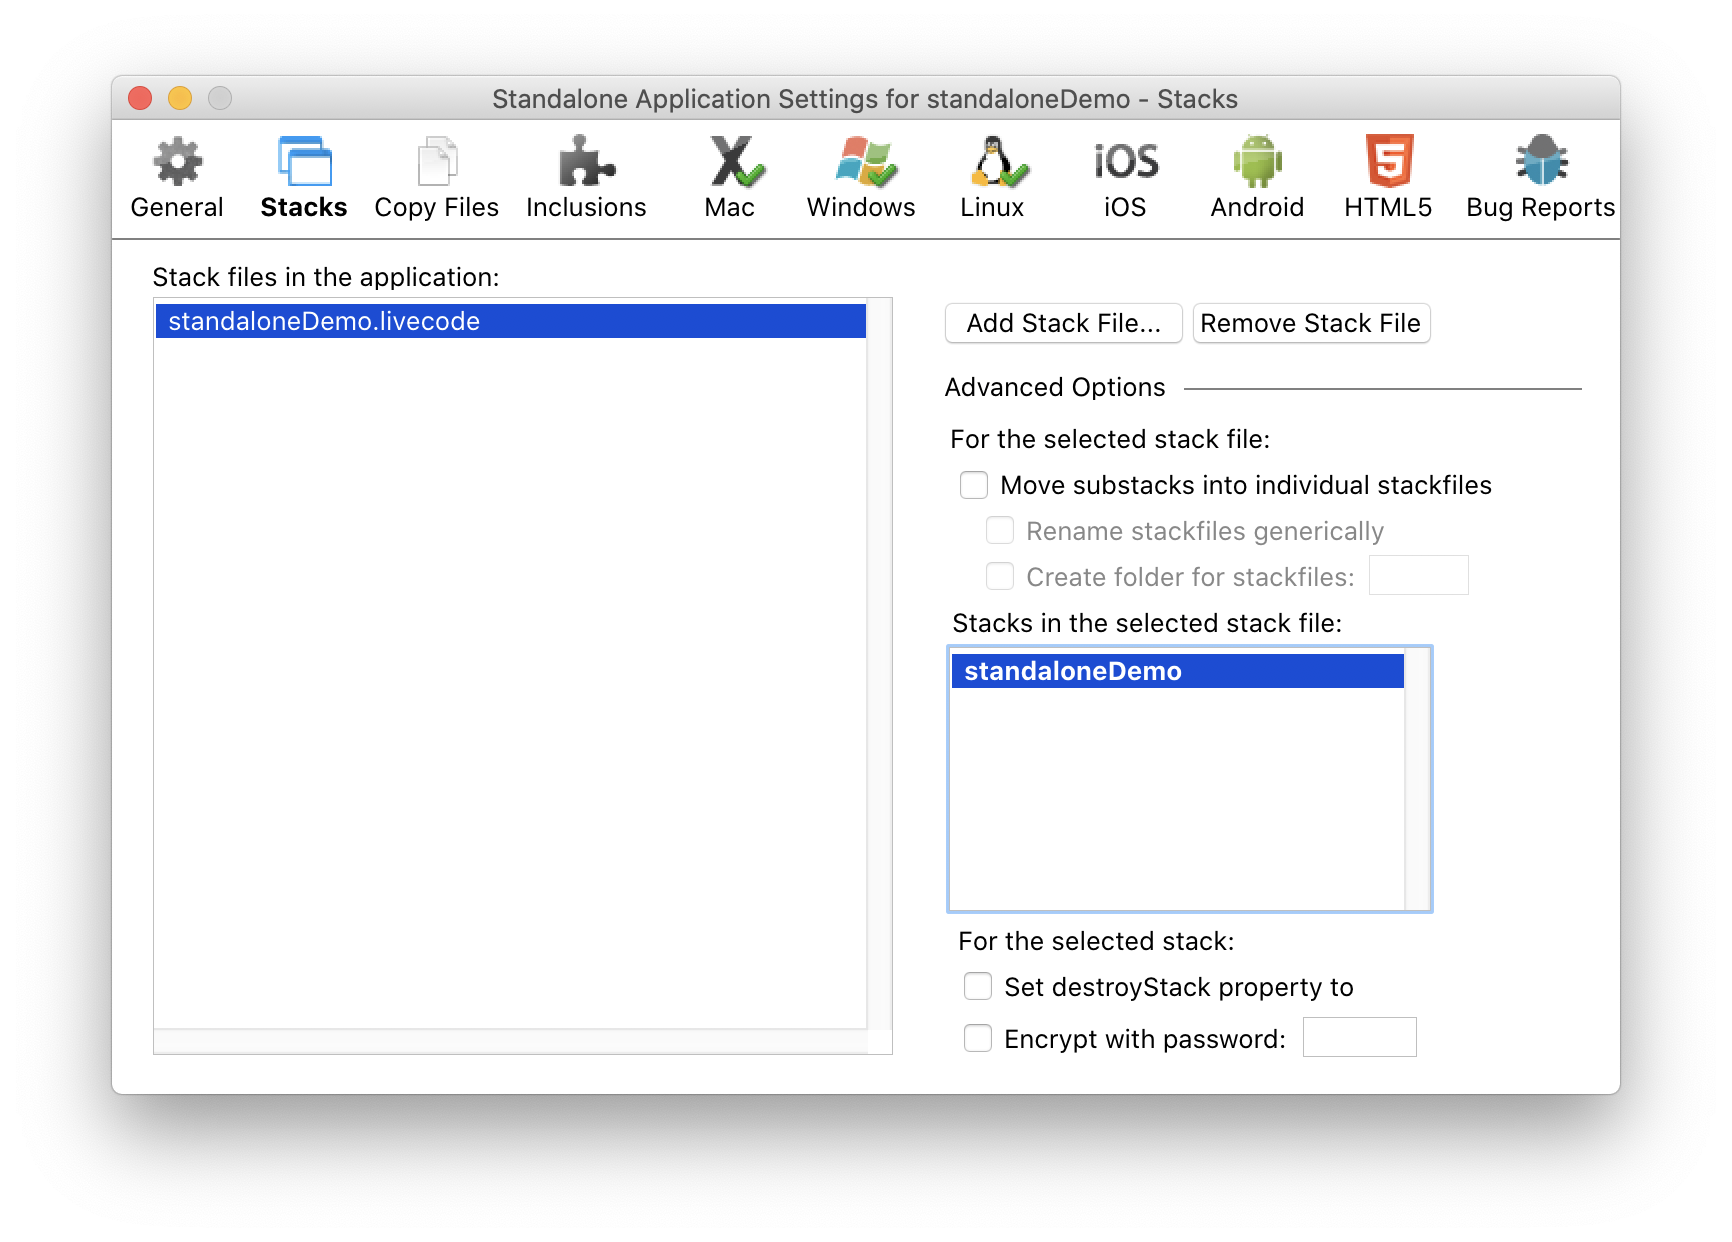
Stack files to include.Here you may select the stack files that are to be included in the distribution. There are buttons that let you add or remove stack files. The mainstack of the selected stack file will always appear first in the "Stacks in the selected stack file" list. Advanced Options Section
|
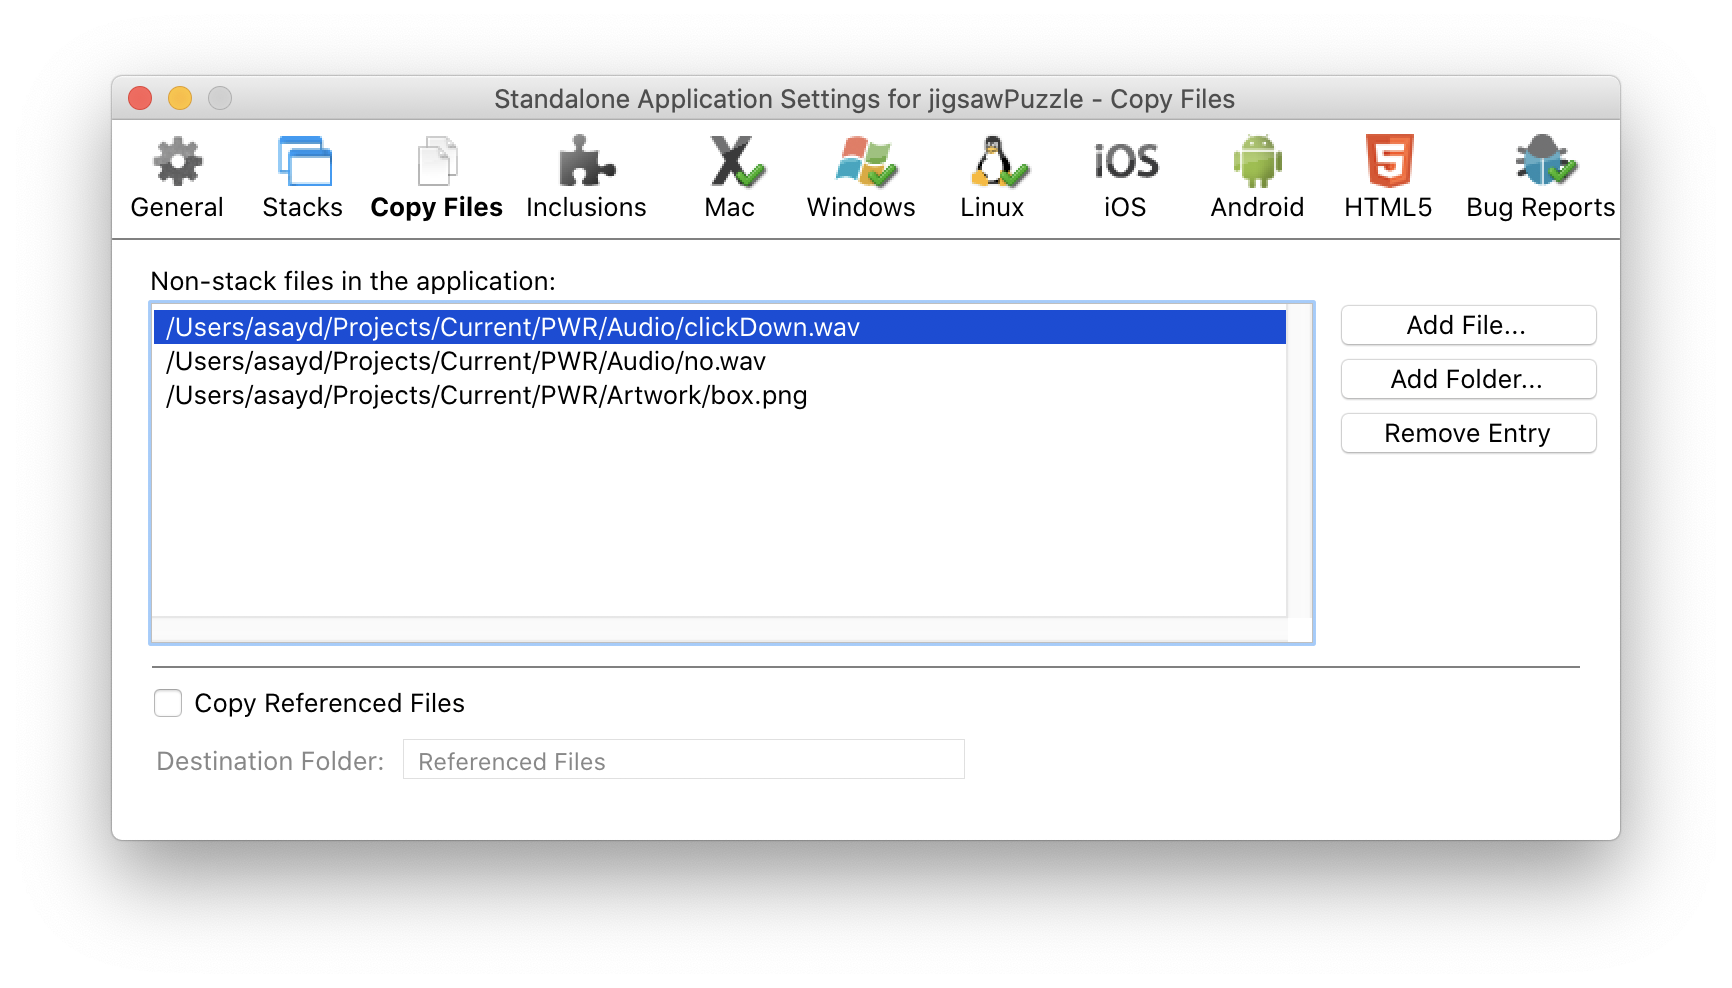 |
Copy Files into the AppIf you want to automatically copy external files—images, video or sound files,for example —into your standalone application folder, use this pane. The files that you add to the application will then be copied to a location that makes it possible for the standalone to find and use them. For Windows executables and Classic Mac OS applications the files will be copied into the same folder as the standalone executable file. For Mac OS X applications: Applications on Mac OS X are actually specialized folders called packages or bundles. Copied external files will be put inside this package so that they will not be immediately visible in the Finder. To see where the files are placed, Control-click or right-click on the application file and choose Show Package Contents from the popup menu. A window will open showing a folder called Contents. Open the Contents folder, then the MacOS folder. Here is where you will find copied files. (Note: If you have set the defaultFolder property in your stack to the folder that contains the stack file, when you create the standalone the defaultFolder will be this MacOS folder. On the other hand, if you never explicitly set the defaultFolder property in your stack, when you create the standalone the defaultFolder is set to the folder that contains the application package.) |
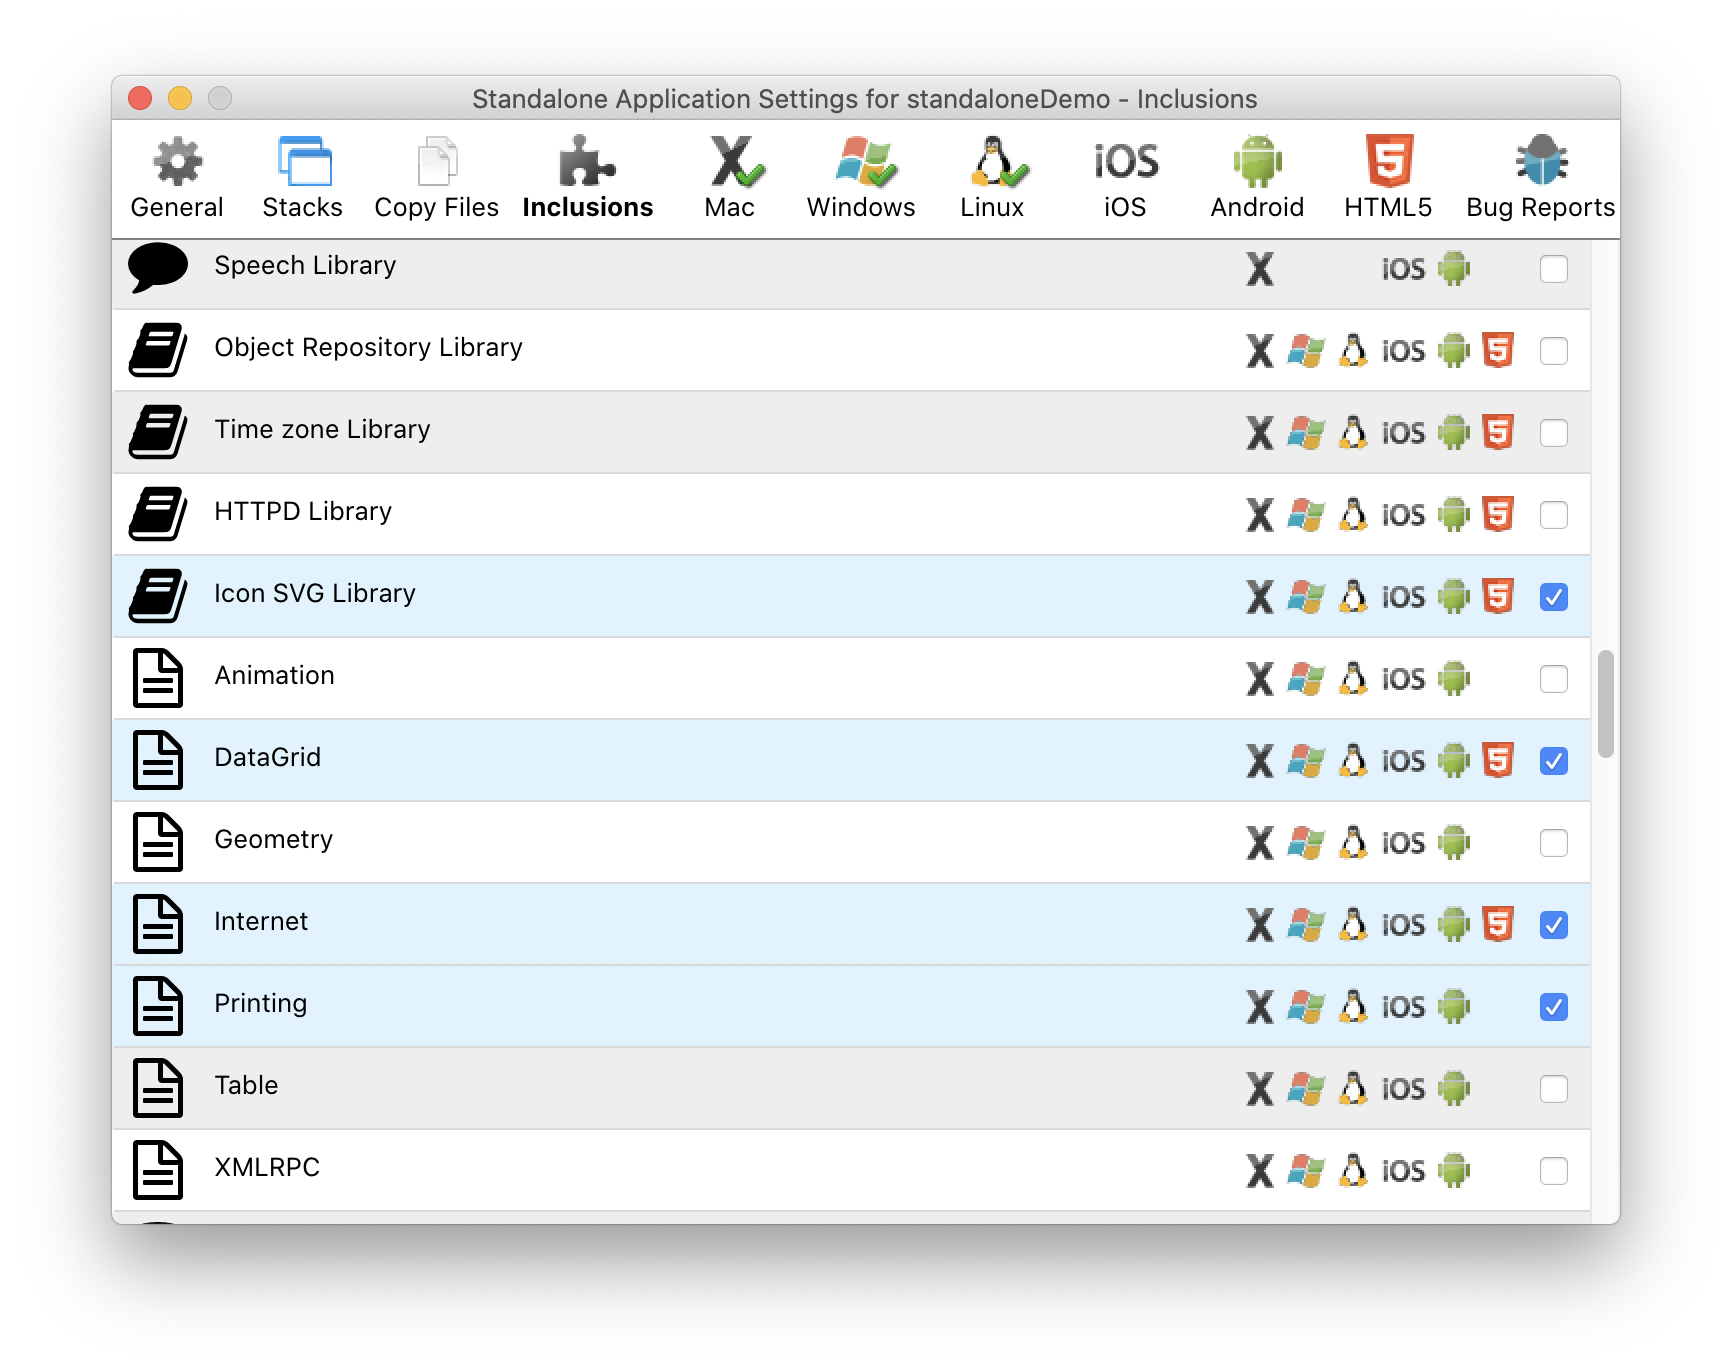 |
InclusionsIf you chose to manually select inclusions on the General tab, this is where you make your selections. What you check depends upon what resources your stack uses. For instance, if there is no printing functionality in your stack you don't need to include the Printing library in the distribution. On the other hand, if you use the ask and answer commands in your stack be sure to check the Ask Dialog and Answer Dialog check boxes to include those assets in your standalone. Likewise, if your stack includes widgets, you must select the needed widget libraries for inclusion. |
 |
Set OS Specific SettingsThese six tabs are where you designate which platforms to build for. They also allow you to specify settings that determine how the standalone file will appear in the file system of the operating systems for which you are building your app. For example, in these tabs you can set things like the application icon*, version number, and copyright notices. |
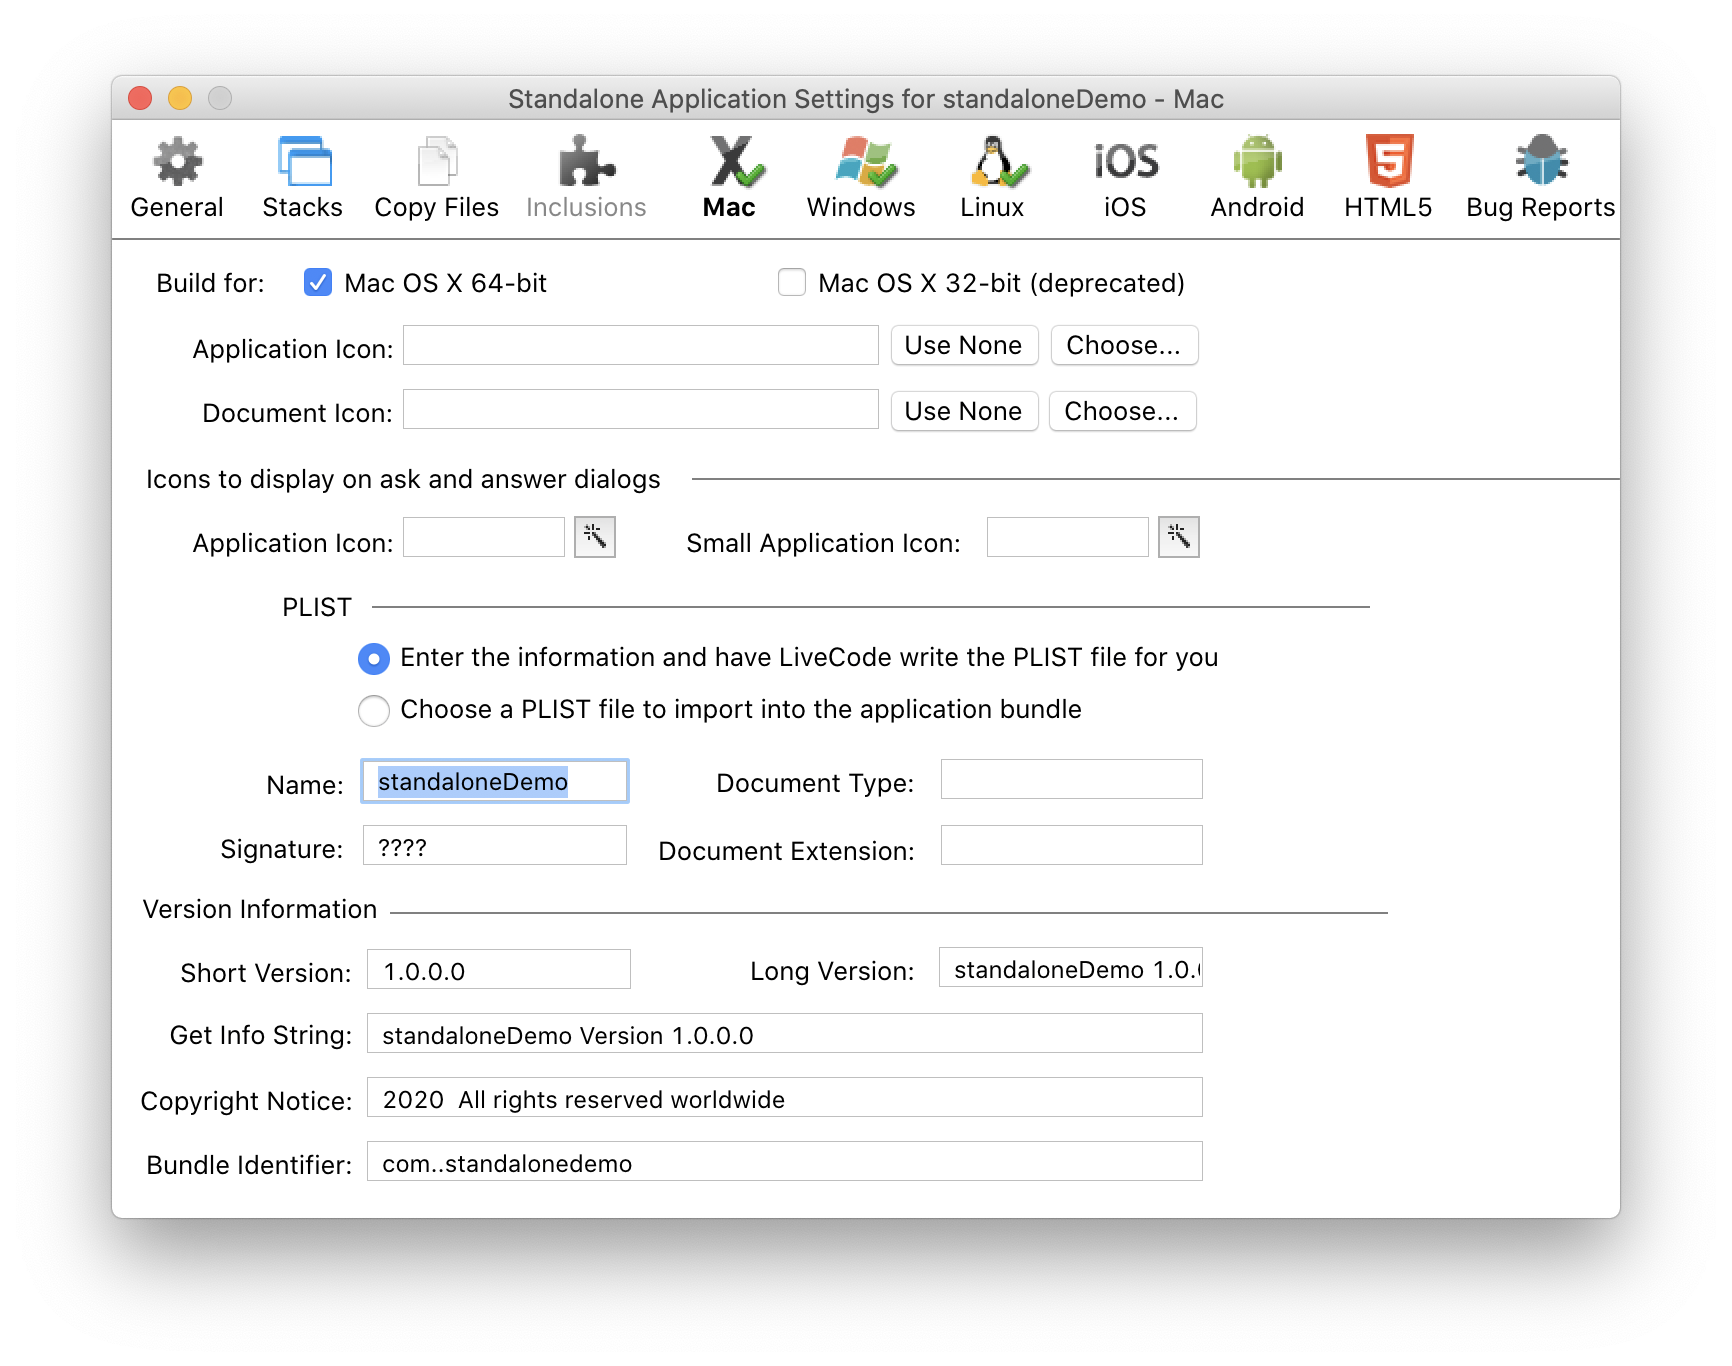 |
OS X PaneCheck the Build for Mac OS X box to save a standalone that will run under Mac OS X. Build for: This refers to the processor types that Mac OS may run under. All modern Mac OS X systems run on 64-bit processors. You should only choose 32-bit if you are building for an older Mac running an old operating system. Icons*: You can assign a finder icon to the application by choosing a previously-created .icns file with the Choose... button next to the Application Icon field. You can assign a Finder icon to the application's documents by choosing a previously-created icon with the Choose... button next to the Document Icon field. You can also specify a custom icon to be displayed in ask and answer dialogs. PLIST: A plist is basically a specially-formatted preference file. Unless you are familiar with XML and plists in OS X, choose the first option. Name, Signature, Document section:
Version Information section. The information you provide in here will help you keep track of version, copyright and other information under Macintosh OS X. The Long Version and Short Version fields hold strings that describe which version of the application this build is. It is important to carefully increment your version number with each successive build to avoid confusion over which build is the latest. The copyright notice appears in the Finder's Get Info box for your application. The bundle identifier helps identify your application to the OS. Typically a bundle identifier is in the form of a reverse URL, for example, com.mycompany.myapplication.
|
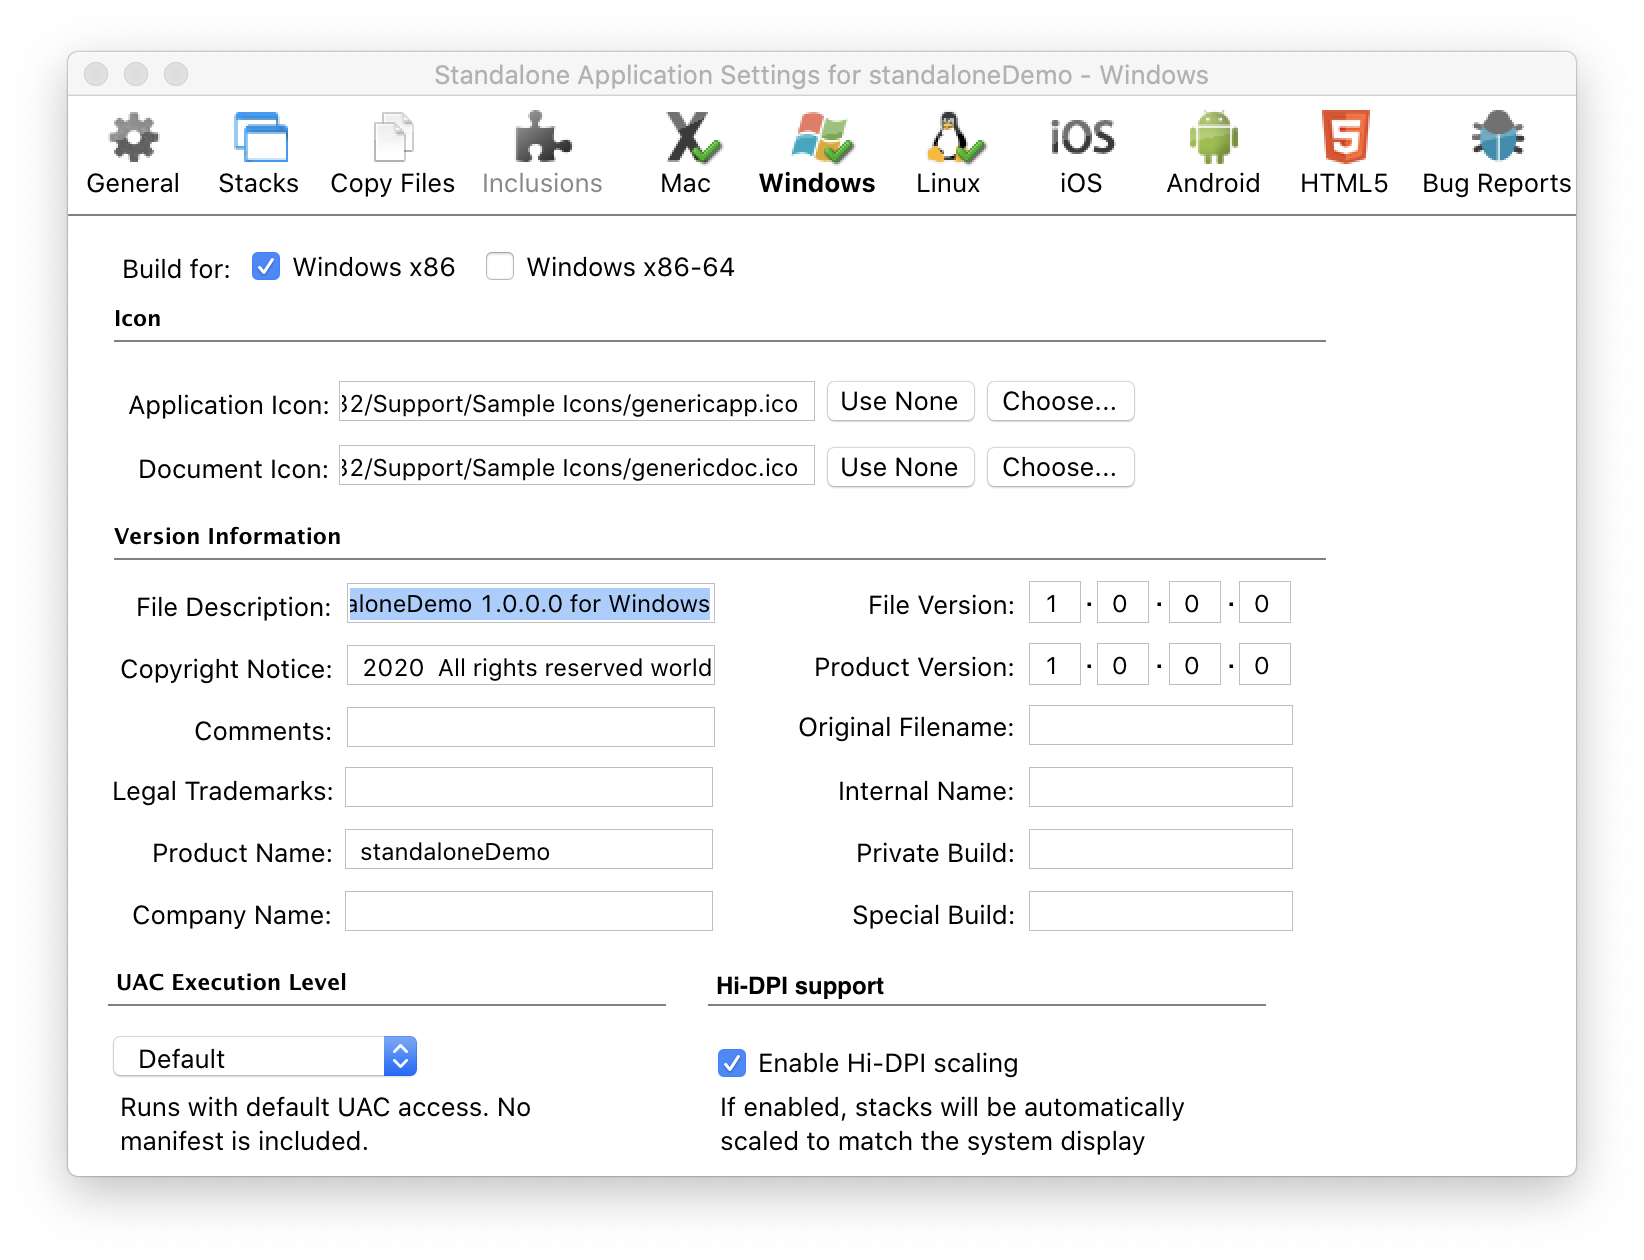 |
Windows PaneThis tab is where you may include Windows-specific information, such as which icons* will appear with the application, version and copyright information, and others. It is important to carefully increment your version number with each successive build to avoid confusion over which build is the latest. You can assign an icon to your Application by clicking Choose... and navigating to a previously-created .ico file. |
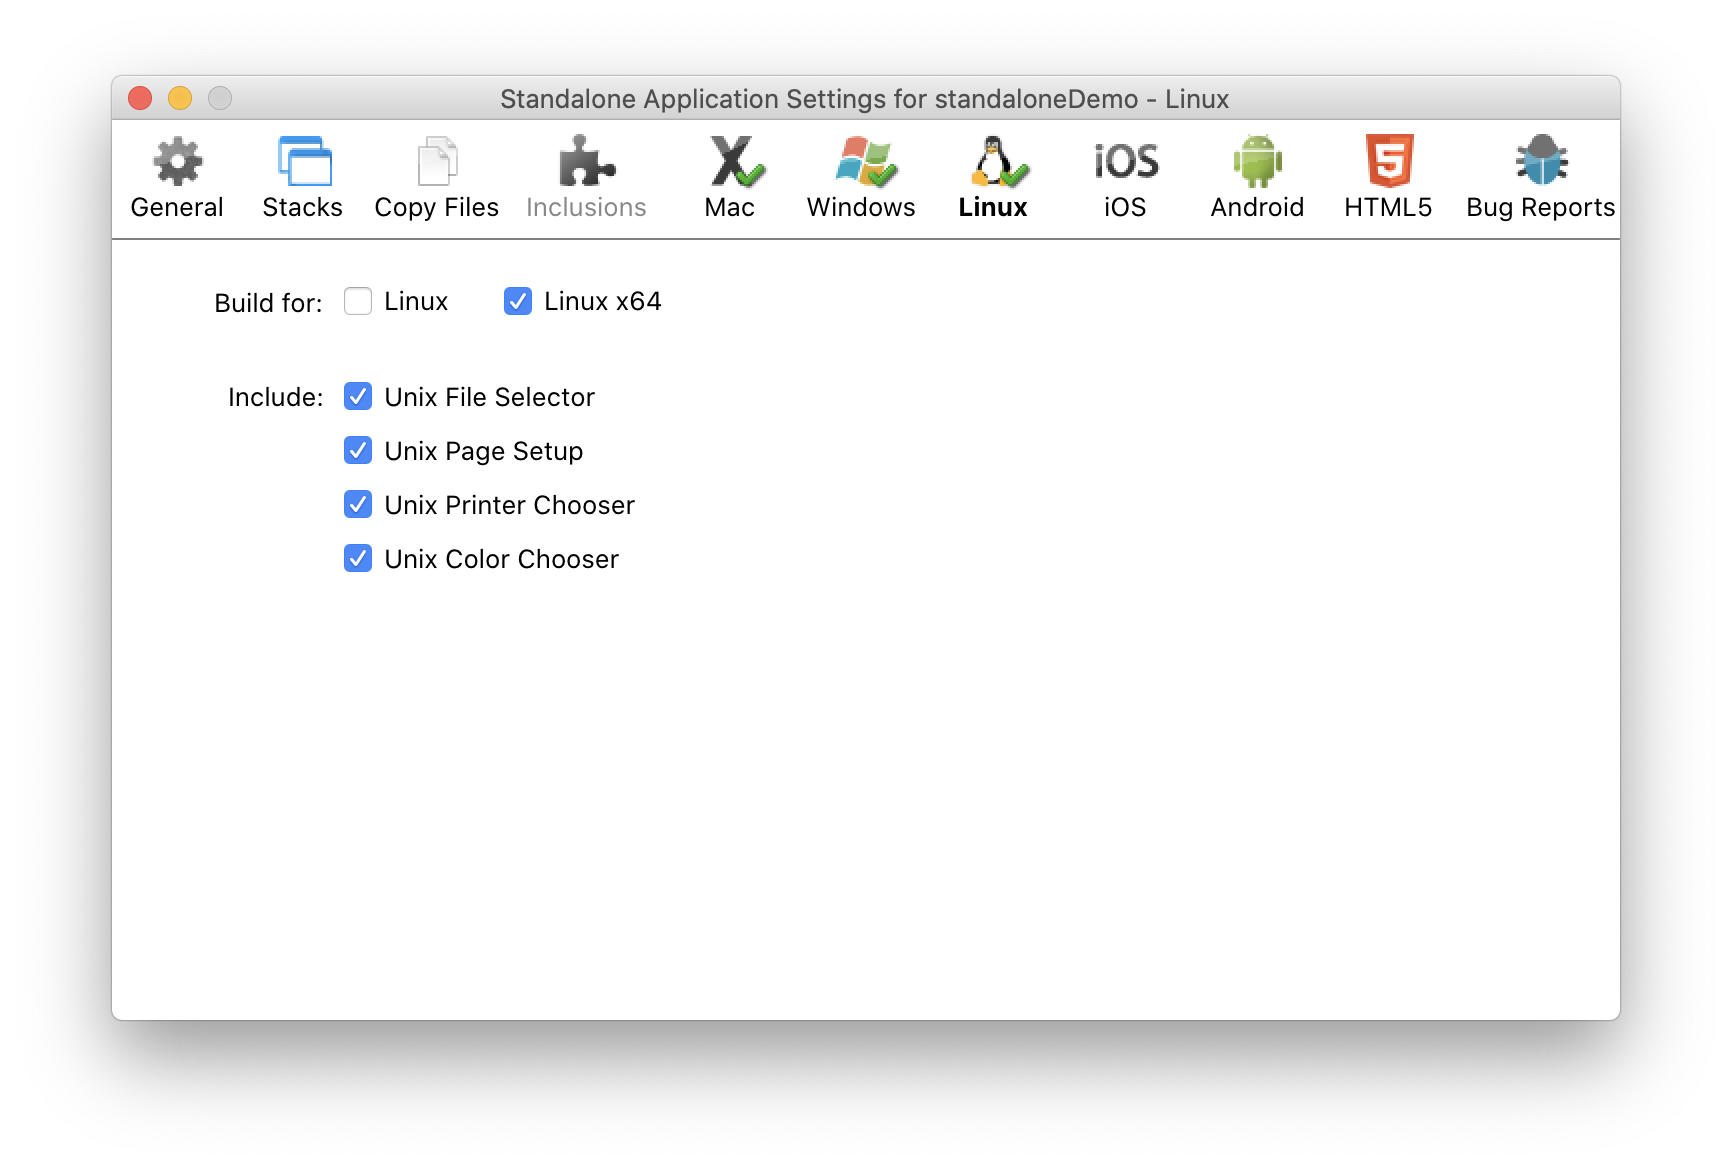 |
Linux Pane Build for: Choose the version of Unix/Linux you want to run your application on. Include: Unix-specific libraries you may wish to include in your application. |
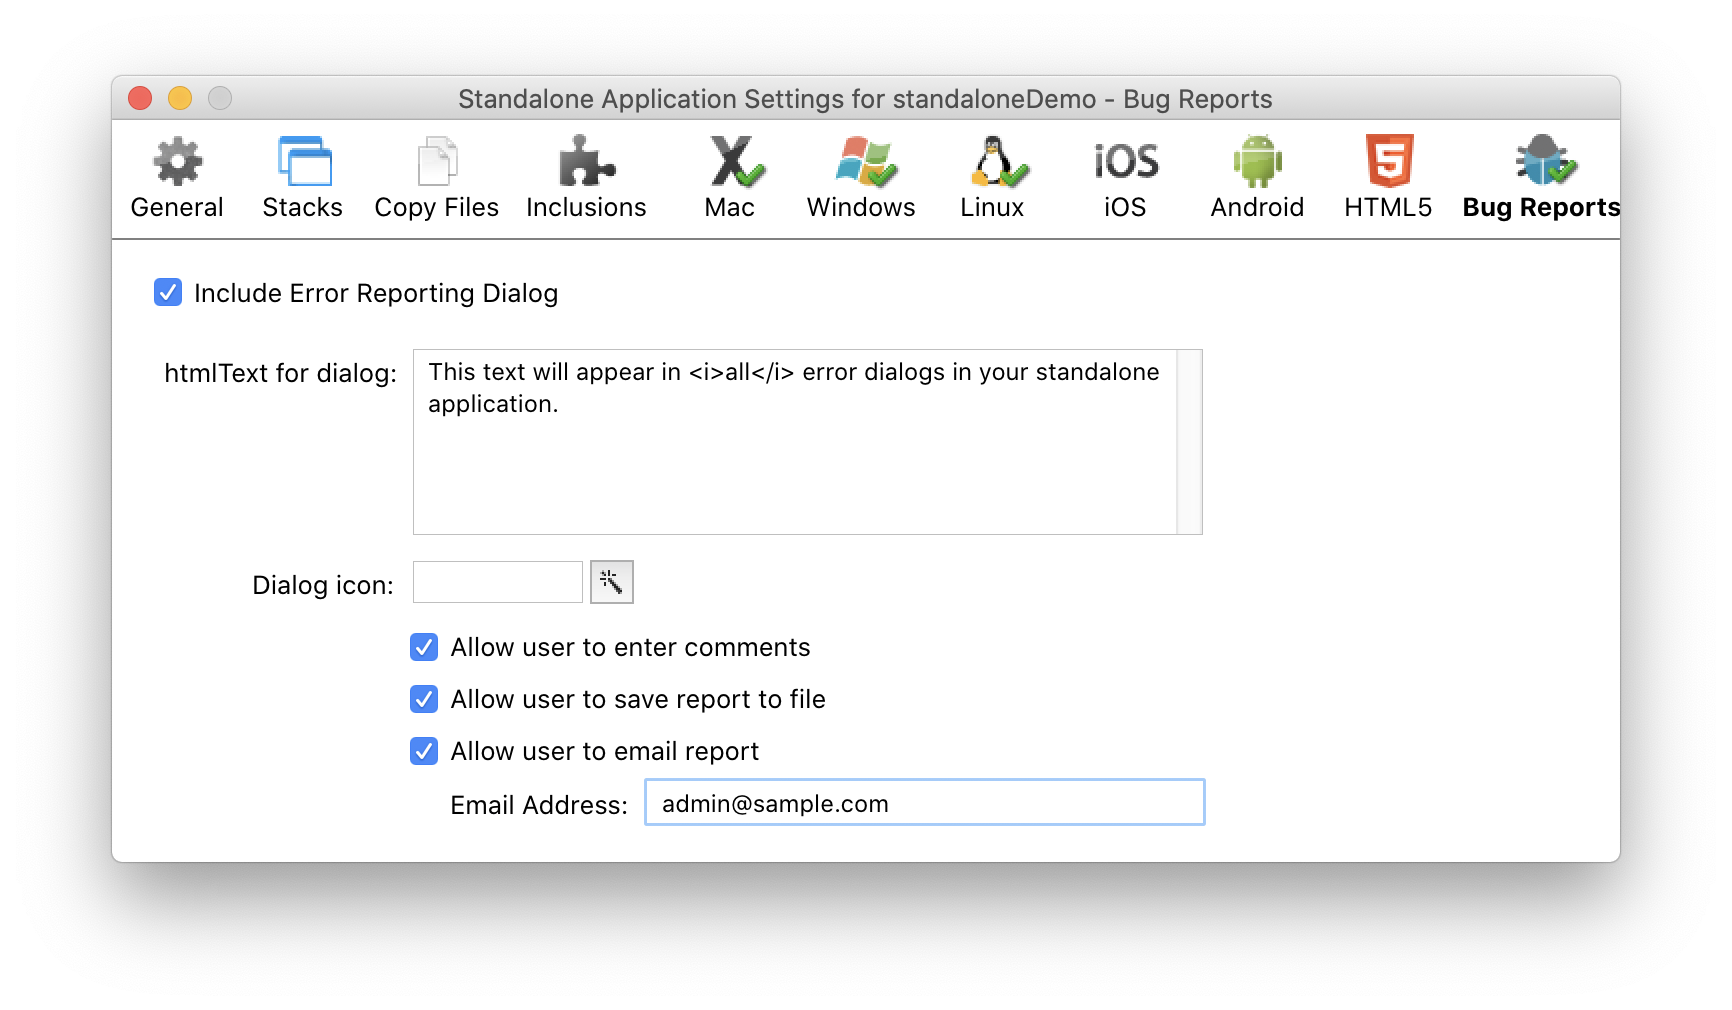 |
Bug Report PaneIf you wish to provide a mechanism for your users to report bugs and errors back to you, click the Include Error Reporting Dialog box. You can then customize the error dialog text, assign a custom error dialog icon, and allow the user to save the report, enter their own comments, and even email you a copy of the error to assist you in debugging. |
*Custom application icons: More information on creating icons for standalone applications can be found in this excellent tutorial by Chipp Walters of Altuit, Inc., an independent developer who uses LiveCode extensively.