Here are a number of miscellaneous commands which you will find useful in the upcoming assignments and projects.
Push/pop Example:
Let's say you have a button on a card in your stack with this mouseUp handler:
on mouseUp
   push card
   go to card "someCard"
end mouseUp
When you get to the other card, issuing the pop card command will take you right back to the original card.
The command push card stores the identification of the current card in a special location in LiveCode's memory. The command pop card retrieves that stored information and goes directly to that card. These are used keep a pointer/bookmark to a particular card. So if you “push” a card then go wandering around from card to card as you please, you can always get directly back to the original card with a pop card statement.
Ordinarily LiveCode constantly updates the screen as things happen in a stack. When you hide an object or show an object or go to a different card, the change shows up immediately. The command lock screen freezes the screen appearance and blocks any visible changes until an unlock screen occurs. The only exception to this is the mouse cursor. It continues to move with the mouse and any changes to the cursor icon (like set cursor to busy) do appear. The command unlock screen unfreezes the screen and allows LiveCode to update the appearance with whatever changes may have happened. It is good programming practice to always unlock the screen after you have locked it in a handler.
You can optionally specify a visual effect when using the unlock screen command. To do this you need to cue up the visual effect during the lock screen step, then call the visual effect on unlock screen, like this;
lock screen for visual effect
hide image "smileyface"
show button "check"
unlock screen with visual effect "dissolve"
The changes will happen while the screen is locked and then transition to the updated screen using the named visual effect.
Placing multiple screen changes inside a lock-unlock block allows you to do some processing “behind the users’ backs” without them seeing what’s happening. This technique is particularly useful when you have something that takes several steps to accomplish (such as updating objects on a card) and you want them to see only the final result.
An exit statement inserted into a handler allows you to abort the executing script, or a portion of it. There are three main forms of the exit statement.
exit handler
Use the exit handler form when you want to stop execution of the current handler. A common situation might be when certain conditions must be met to continue execution, but when they are not met you can abort the handler. The handler must be the name of the message handler that the statement appears in.
on mouseDown
   if the mouseLoc is within the rect of field "showLocation" then
      put the mouseLoc into fld "showLocation"
   else
      exit mouseDown # must match handler name
   end if
end mouseDown
exit to top
The exit to top statement is similar to exit handler, but instead of just aborting the current handler, it will abort all executing handlers, including handlers that may have called the currently executing one.
on mouseUp
   put "Logging in..."
   show field "progress message"
   doLogin
   hide field "progress message"
end mouseUp

on doLogin
   ask "Enter your login name:"
   if it is empty then
      exit to top # stop here if the user didn't give an input
   end if
   put it into field "loginname"
end doLogin
Note that in the previous example, the "progress message" field (referred to in the mouseUp handler) will remain showing if the user doesn't give an input to the ask command. Exit to top aborts all running handlers.
exit repeat
As the name implies, exit repeat will abort the repeat loop in which it occurs, and resume executing the handler after the end repeat statement. Thus it can act as another way to terminate a repeat loop.
on mouseUp
   put field "factor" into tFactor
   repeat
      multiply field "total" by tFactor
      if field "total" > 10000 then
         exit repeat
      end if
   end repeat
   answer "The total is too high to continue!" with "OK"
end mouseUp
answer and ask CommandsThere are several ways LiveCode gives you to allow the user to give inputs or responses to your program. They are built around the keywords answer and ask.
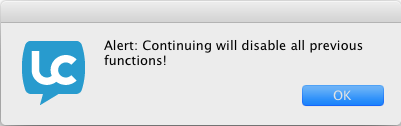
Answer Dialog (Mac OS X)
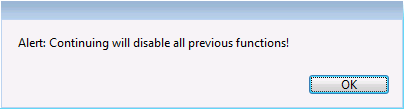
Answer Dialog (Windows 7)
answerThe answer command creates a dialog box, and the user is given buttons from which to choose his/her response. A dialog box is quite useful for getting the user's attention, particularly since the box if imposed in front of the card, and the user can do nothing until the box is acknowledged and dismissed. The simplest form of the command requires the keyword answer followed by a prompt of some sort:
answer "Alert: Continuing will disable all previous functions!"
When given in this fashion, the prompt literal is displayed in the top section of the dialog box. A button labeled "OK" is positioned at the bottom to the right. When the user clicks OK, "OK" is returned in the it variable.
If you desire to create custom buttons for the user to choose in the dialog box, these can easily be set with scripting. Follow the syntax for the prompt from the answer command given above, then add "with" and whatever you desire to appear as a button in quotations after the "with":
answer "You haven't answered all the questions." with "Duh!"
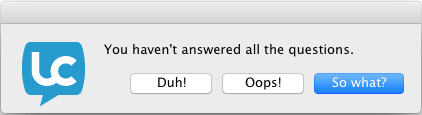
Answer Dialog with Multiple Buttons
If you want to give multiple buttons as choices, add "with" and the first button label in quotations, separate choices with "or" and add the next button label in quotations:
answer "You haven't answered all the questions." with "Duh!" or "Oops!" or "So what?"
The last button label in the list will appear as the default button in the dialog box (meaning that if the user presses return, this button will execute). Whichever button the user clicks on will be returned in the it variable, which can then be used to perform certain functions.
Your limit on how many buttons you can specify in the dialog box is determined by the operating system (I found the limit to usually be seven, and you don't usually want that many). However, interface design conventions suggest that no more than three choices should be presented in a dialog box. The number of characters that can be used in the prompt and buttons of the dialog box differs according to operating system. The prompt will fit as many lines as will fit within the dialog box size of the operating system you are on. Buttons will expand to fit the label you have specified (but the limit does depend on the operating system; 80 characters is about the maximum size I've found).
As mentioned before, this is an effective way of getting the attention of the user. It can also be configured to give the user an opportunity to input some information (to a degree) that can affect the operation of the application after the choice has been made.
Here’s a sample handler that uses an answer dialog:
on mouseUp
   answer "Are you sure you want to exit the quiz?" with "Cancel" or "Exit"
   if it is "Cancel" then
      exit to mouseUp
   else
      # do wrap-up things for the quiz here, e.g.
      put tFinalScore into field "score"
      go card "mainMenu"
   end if
end mouseUp
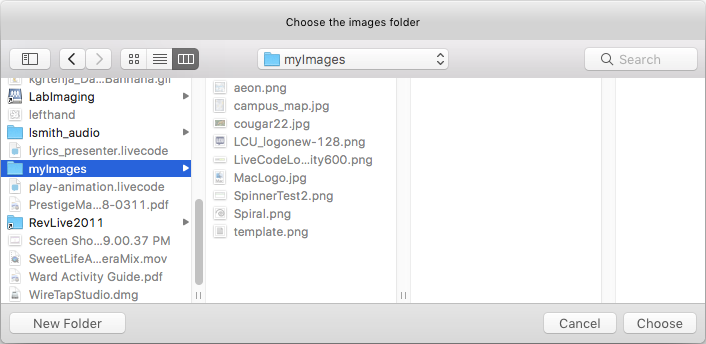
Answer folder Dialog (Mac OS X)
answer folderThe answer folder command gives the user a way to designate a folder as "selected", for the purpose of reading or writing files to that folder, for instance. Let's say you wanted to designate a folder as the source folder for a set of images to be displayed in your program. You could do something like this in a button:
on mouseUp
   answer folder "Choose the images folder"
   if it is empty then # i.e. the user cancelled
      exit to top
   else
      #
      put it into tFolderPath
      put files(tFolderPath) into field "myImages"
   end if
end mouseUp
Notice that the answer folder command returns the file path to the selected folder in the it variable.
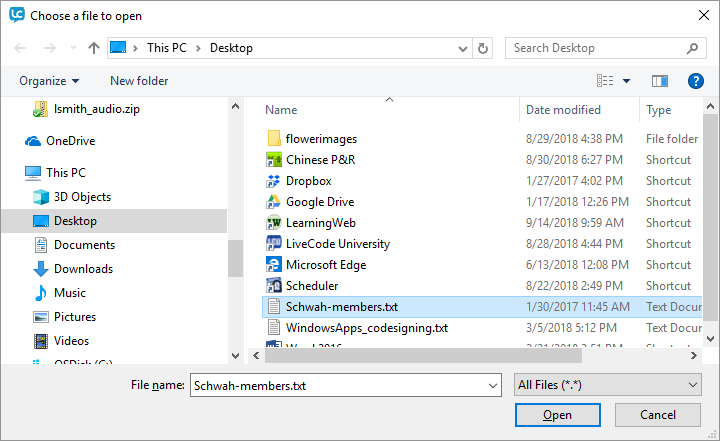
Answer file Dialog (Windows 10)
answer fileThe answer file command lets you present the user with a standard file browser, in order to choose a file to work on. For example, say you want to let the user open a text file for editing. It might look something like this:
on mouseUp
   answer file "Choose a file to open"
   if it is empty then # i.e. the user cancelled
      exit to top
   else
      #
      put it into tFilePath
      put URL ("file:" & tFilePath) into field "editor"
   end if
end mouseUp
Just as with answer folder, the answer file command returns a file path to the it variable, in this case the absolute file path to the file.
askAnother type of dialog box is created using the ask command. This creates a dialog box with a place for the user to type a response. The simplest form of the command requires the keyword ask followed by a prompt of some sort:
ask "Please enter your student number:"
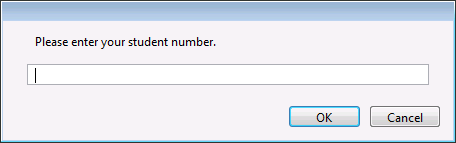
Ask Dialog
When given in this manner, the prompt is displayed in the top section of the dialog box. A field is provided for the user's response, and buttons labeled "OK" and "Cancel" are positioned at the bottom, with "OK" designated as the default. If the user clicks "OK" (or presses Return), the contents of the field are returned in the it variable. Clicking "Cancel" returns "Cancel" instead of the contents of the field.
If you desire to show the user a suggested response in the dialog box, follow the syntax for the ask command described above and add "with" and then a default response in quotation marks:
ask "What is your name?" with "LastName FirstName"
Whatever literal was typed in quotations after the "with" will be shown hilited in the hilite color in the field in the dialog box provided for the user. The user can now choose to either keep that response (and click OK or press return) or type in a different one of his own. The two buttons work as before.
The number of characters that can be used in the prompt and response of the dialog box differs according to operating system. The prompt will fit as many lines as will fit within the dialog box size of the operating system you are on. The response can also have multiple lines (the number depends on operating system), but only one line will be shown at a time. In order for the other lines to be seen, the down and up arrow keys must be used.
This type of dialog box is extremely useful in extracting specific information from the user, which information can then be used in several different fashions or employed in several different functions. The possibilities are limitless.
Here’s a sample handler that uses both an ask and an answer dialog:
on requestNumber
   ask "Please enter your student number."
   if it is empty then
      exit to top
   end if
   if it is not a number then
      beep
      answer "Please enter numerals only."
      requestNumber # run this handler again
   else
      put it into tStudentNum
   end if
end requestNumber
The do command will take a line of text and execute it as a command. Usually the line of text comes from a field or variable. Let's say you have the following field "myCode":
field "myCode"
put "Hello World" into field "otherField"
Now if you create a button with this handler:
on mouseUp
   do field "myCode"
end mouseUp
When you click the button the command in field "myCode" will run just as if it were in a regular script. In fact, the do command will execute any number of lines, as long as all of the lines of text are properly formed LiveCode scripting. Thus this capability potentially could allow the end user of your LiveCode app to execute LiveCode scripting statements. However before you get all excited about reproducing LiveCode's functionality in your own application, keep in mind that allowing others to write scripts at will is a huge potential security hole, and at any rate the LiveCode Terms of Use license prohibits users from creating applications that directly compete with LiveCode.
The grab command allows the end user to “pick up” an object with the mouse, while in run mode, and move it to another location. This command is particularly useful when creating a drag and drop activity. Here’s an example. Let’s say you have an image object that you want the user to be able to drag around the card at will. Simply put this handler in the image object’s script:
on mouseDown
  grab me
end mouseDown
When the mouse is clicked down on the image, it will “stick” to the mouse cursor and follow it around the screen until the mouse is released.