In teaching languages, sound files are an invaluable tool. Providing spoken examples of speech in the target language is an integral part of teaching the language to students. Even instruction in other subject areas may employ sound as an effective enhancement. These notes are designed to walk you through the process of creating a simple application recreating a dialog between two individuals in a target language. The principles covered here can be easily extended to any situation where sound is needed.
| In class we will produce a functional Audio Dialog stack. The process described below is an example of the steps we might go through when designing and programming an activity of this type. |
The first step is to record the dialog and convert it to computer format, a process known as digitizing. If you have a commercially produced dialog on tape or compact disc, you'll need permission from the publisher to digitize the dialog. If you're recording your own, for best results be sure you do it in a professional recording studio with qualified help. In either case, you'll need proper equipment to edit the lines of the dialog into 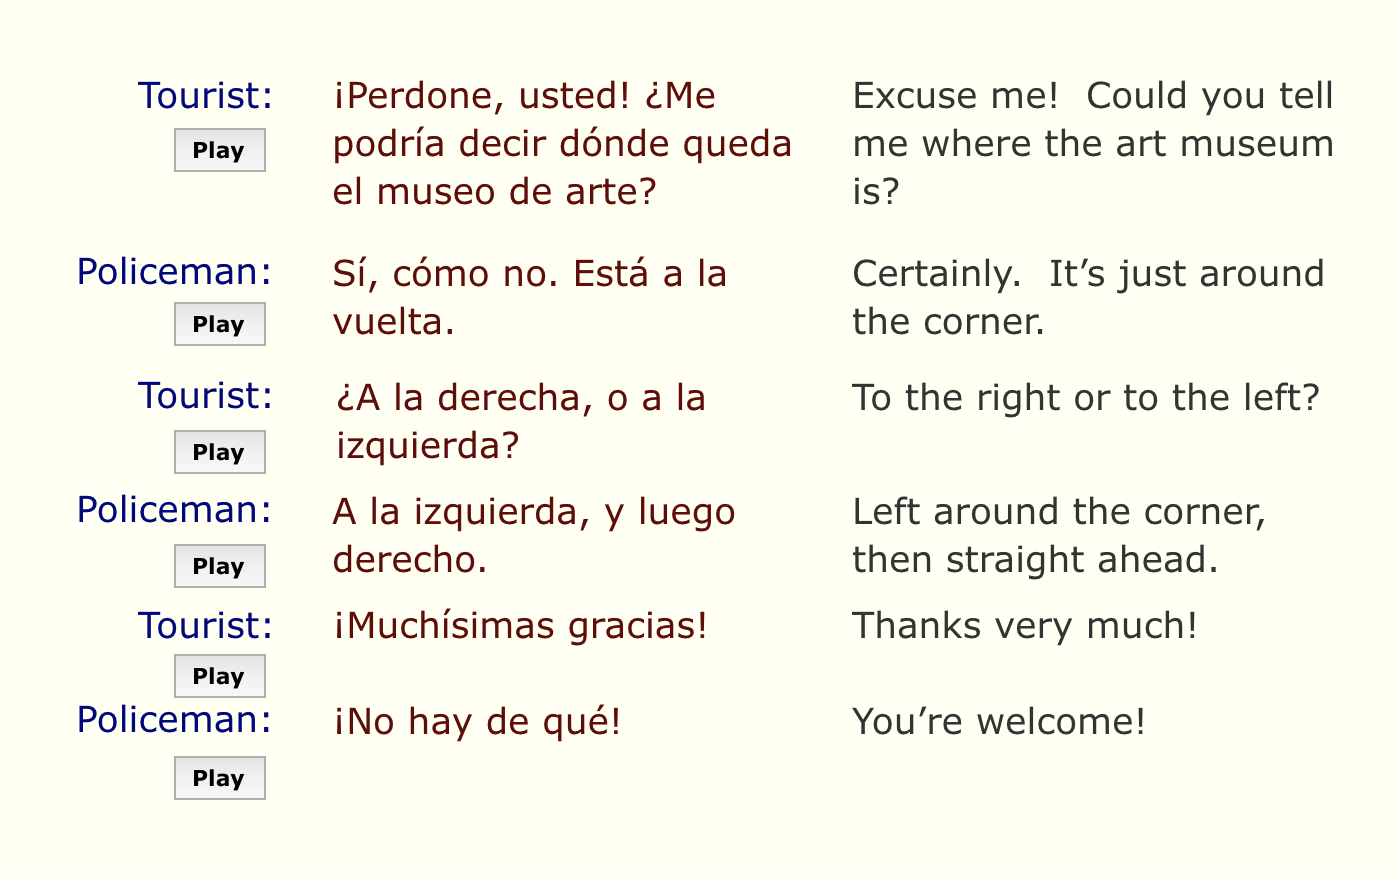 separate items. This will allow us to provide the opportunity for the user to listen to the dialog one line at a time. Remember that LiveCode natively recognizes audio files of these types: wav, aiff , and µ-law (.au), so for this exercise we'll want to use audio files saved in one of those formats.
In presenting the dialog, it might be useful to give the user a transcription in the target language so they can read it as well as hear it. Just as with the recording, the lines of the dialog need to be visually separated from each other. It might also be useful to provide a line-for-line translation of the dialog in the student's native language. As we create our layout in LiveCode, we can place a "Play" button next to each line to indicate to the user that each line of the dialog may be heard separately.
As you recall, sound files in LiveCode may be accessed in two ways. Like images, we can import the sound files into the stack itself, or we can reference the audio in external files. With the data as part of the stack, accessing the sound is simpler, but large sounds quickly increase the size of your stack. As an external file, the sound will not increase the size of the stack, but if the sound file is ever lost or moved, the link may be broken and the stack's audio may become inoperable. The former method is ideal for a small number of short sounds, while the latter is preferable for stacks utilizing a large number of long sounds.
To make a sound file part of your stack, select Audio File... from the Import as Control menu under File. From this same menu you may also choose All Audio Files in Folder... to save time if all your sounds are located in a single folder and are ready to go. In referencing an outside file, you need to provide the full pathname to that file or set the defaultFolder and use a relative file path.
We now need to script the buttons so they give the user access to the sound files. Whether the sounds are imported or referenced, we can use the LiveCode command play to play back those sounds. The following are valid forms of the play command:
play "Question 1"

    play audioClip "mySound.wav" -- the term 'audioClip' is optional

    play "/user/myfolder/clips/ouch.aiff"
The Play command in LiveCode starts the sound playing, then goes on, executing any other commands that may be given. This allows the stack author to program things to happen while the sound is playing (such as an animation). It also allows the user to have control before the sound is finished. If there were anything else to click, the user could do it.
The advantages and disadvantages of this are obvious. The user could conceivably move on in the stack, all while the sound is still playing. While this may be desirable in some cases, it is detrimental in others. We can delay other commands being executed in the script by using:
wait until the sound is done
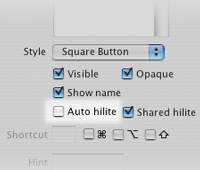 With this in the script, users can't do anything until the sound finishes playing. However, if we leave the Play button's autoHilite property true—its default state—the button may give the visual impression that its action is complete, because the button highlights on mouseDown and unhighlights on mouseUp. This is a case where we want to control the highlighted appearance manually to provide the user with a proper visual representation. Accordingly, let's turn off the button's autoHilite property. Then we'll add the following line to our mouseUp handler before we start playing the sound:
set the hilite of me to true
After the wait statement, we turn the hilite off again:
set the hilite of me to false
With this in place the play button works in a way that is visually more appropriate to what we are doing. We can use this technique for each button in the dialog.
But wait. The idea of having essentially the same handler in several different buttons should strike you as sick and wrong. With a little bit of thought, the handler could be designed to be placed in the card (or a group) script and still work for all buttons concerned.
In a dialog exercise it's always nice to have a capability to hear the entire dialog at once, rather than being forced to listen to it one statement at a time. ![]() To that end we could create a "Play All" button which would play each clip in sequence. This is a situation where we could use the send command and loop through buttons, sending a mouseUp to each in turn. Just make sure you leave unwanted buttons out of the loop appropriately. A good way to do this is to put the Play buttons in a group and do something like this:
To that end we could create a "Play All" button which would play each clip in sequence. This is a situation where we could use the send command and loop through buttons, sending a mouseUp to each in turn. Just make sure you leave unwanted buttons out of the loop appropriately. A good way to do this is to put the Play buttons in a group and do something like this:
repeat with i = 1 to number of buttons in group "playGrp"

    send "mouseUp" to button i of group "playGrp"

end repeat
While it might be okay to play a short line of dialog without providing a way to stop playback, playing a long dialog without providing a way to stop it is a bad practice that is a sure way to provoke the wrath of your users. ![]() So we should provide a "Stop All" button that will interrupt the playback of the entire dialog. Remember that
So we should provide a "Stop All" button that will interrupt the playback of the entire dialog. Remember that play stop will stop any sound currently playing. But simply putting this command into your Stop All button won't do the job as the stack has been written so far. The culprit is the wait command in the play buttons. As currently written it blocks all other messages until the handler has finished running. That means that the play stop command won't be sent until after all the lines have finished playing. Fortunately, there is a way to tell the wait command to listen for other messages during the wait period. Just change it to add the with messages clause at the end:
wait until the sound is done with messages
Now the Stop All button should interrupt the sound that is playing. But now there is another problem! Since the Play All button uses a repeat loop, stopping the sound that is playing simply makes the loop skip to the next iteration, and the next line of the dialog begins to play. Remember the exit command we looked at recently? The statement exit to top added to the end of the the Stop All button handler should do the trick.
All that remains is to fix the cosmetic problem that arises due to the fact that we have been manually setting the hilite property of the individual play buttons. You can use a repeat loop in our Stop All button to reset all the Play buttons' hilite property to false.
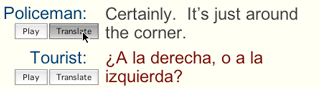
Now let's deal with the translation fields that accompany the dialog. In order for the activity to be productive, we don't want the translations to always be showing. In fact, let's turn them into pop-up fields that are only visible on demand. We could add an appropriate button for each line of dialog do this.
 What popup method would be best? Well, "click + click" requires unnecessary clicking, and the mouseEnter/mouseLeave combination is too "accidental," so the mouseDown/mouseUp pair appears the most desirable in this situation. Again, having the same handlers in several different buttons is bad form, so figure out a way around this.
It might work well to place the translation to pop up on top of the corresponding text in the target language. Just move the translation fields over the top of the target language field and resize them so that they completely cover them. With respect to the fields' appearance, it might be best if the properties of the fields and the texts were identical, with the exception of the font color, in order to tie the two together but still indicate a difference.
As described up to this point, this dialog stack is quite functional, but also quite bland (vanilla ice cream compared to burnt almond fudge). You have several tools and skills and design principles in mind upon which you can draw to augment and extend beyond this meager example. Your assignment, then, is to create a dialog activity in a language of your choice.
go to stack URL "http://chum210.byu.edu/keys/audioJukebox.rev"

go to stack URL "http://chum210.byu.edu/keys/DialogFinal.rev" There you have it. As always, this is only one of a myriad of ways of approaching this type of activity. This is not necessarily the most effective or most efficient, but it works and works well. Hopefully, this will inspire your minds as to the possibilities that exist with LiveCode and spark some creativity of your own. (And remember, you may also want to include an activity like this in your own final project.)